Step 4: Configure and Test Your App
After deploying, you need to find your Reaktor Deployment to configure and test it. There are two ways to get there.
Option A: Via App Instances (Recommended)
- Go to App Instances in the left sidebar
- Click on your App Instance to open its detail view
- Select the Reaktors tab to see all Reaktor Deployments belonging to this App
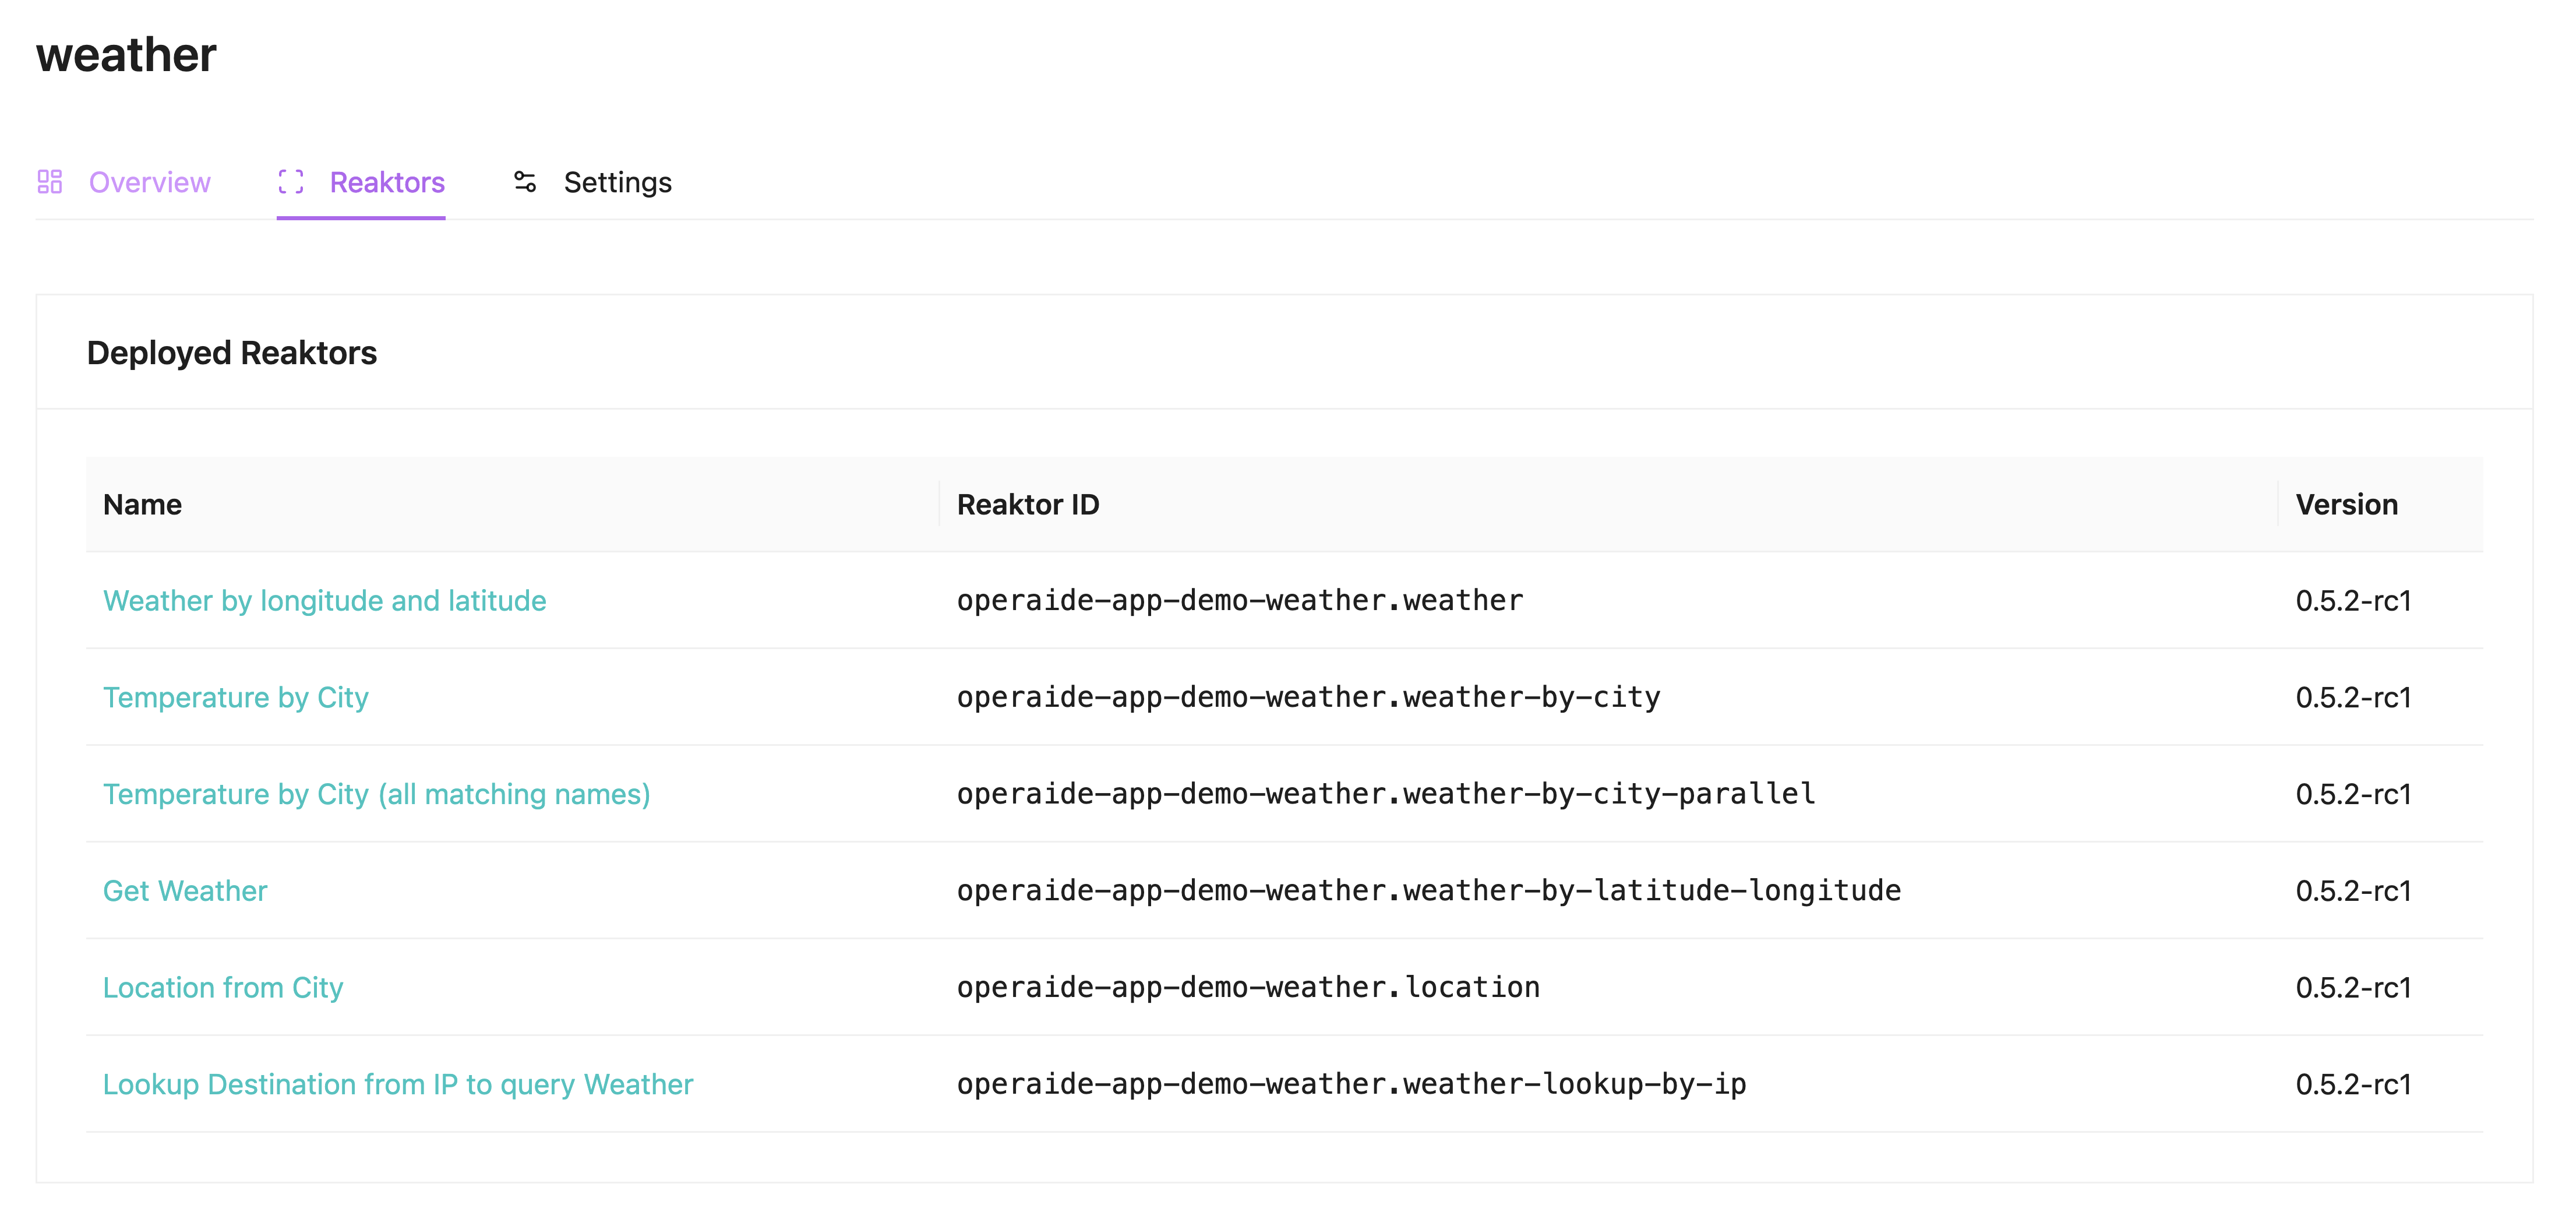
- Click on the Reaktor Deployment you want to test
Option B: Via Reaktor Instances
Navigate to Reaktor Instances in the left sidebar and click directly on the deployment you want to open. This is a flat list of all Reaktor Deployments across all your App Instances — useful once you know the name of the Reaktor you are looking for.
Reaktor Deployment Detail
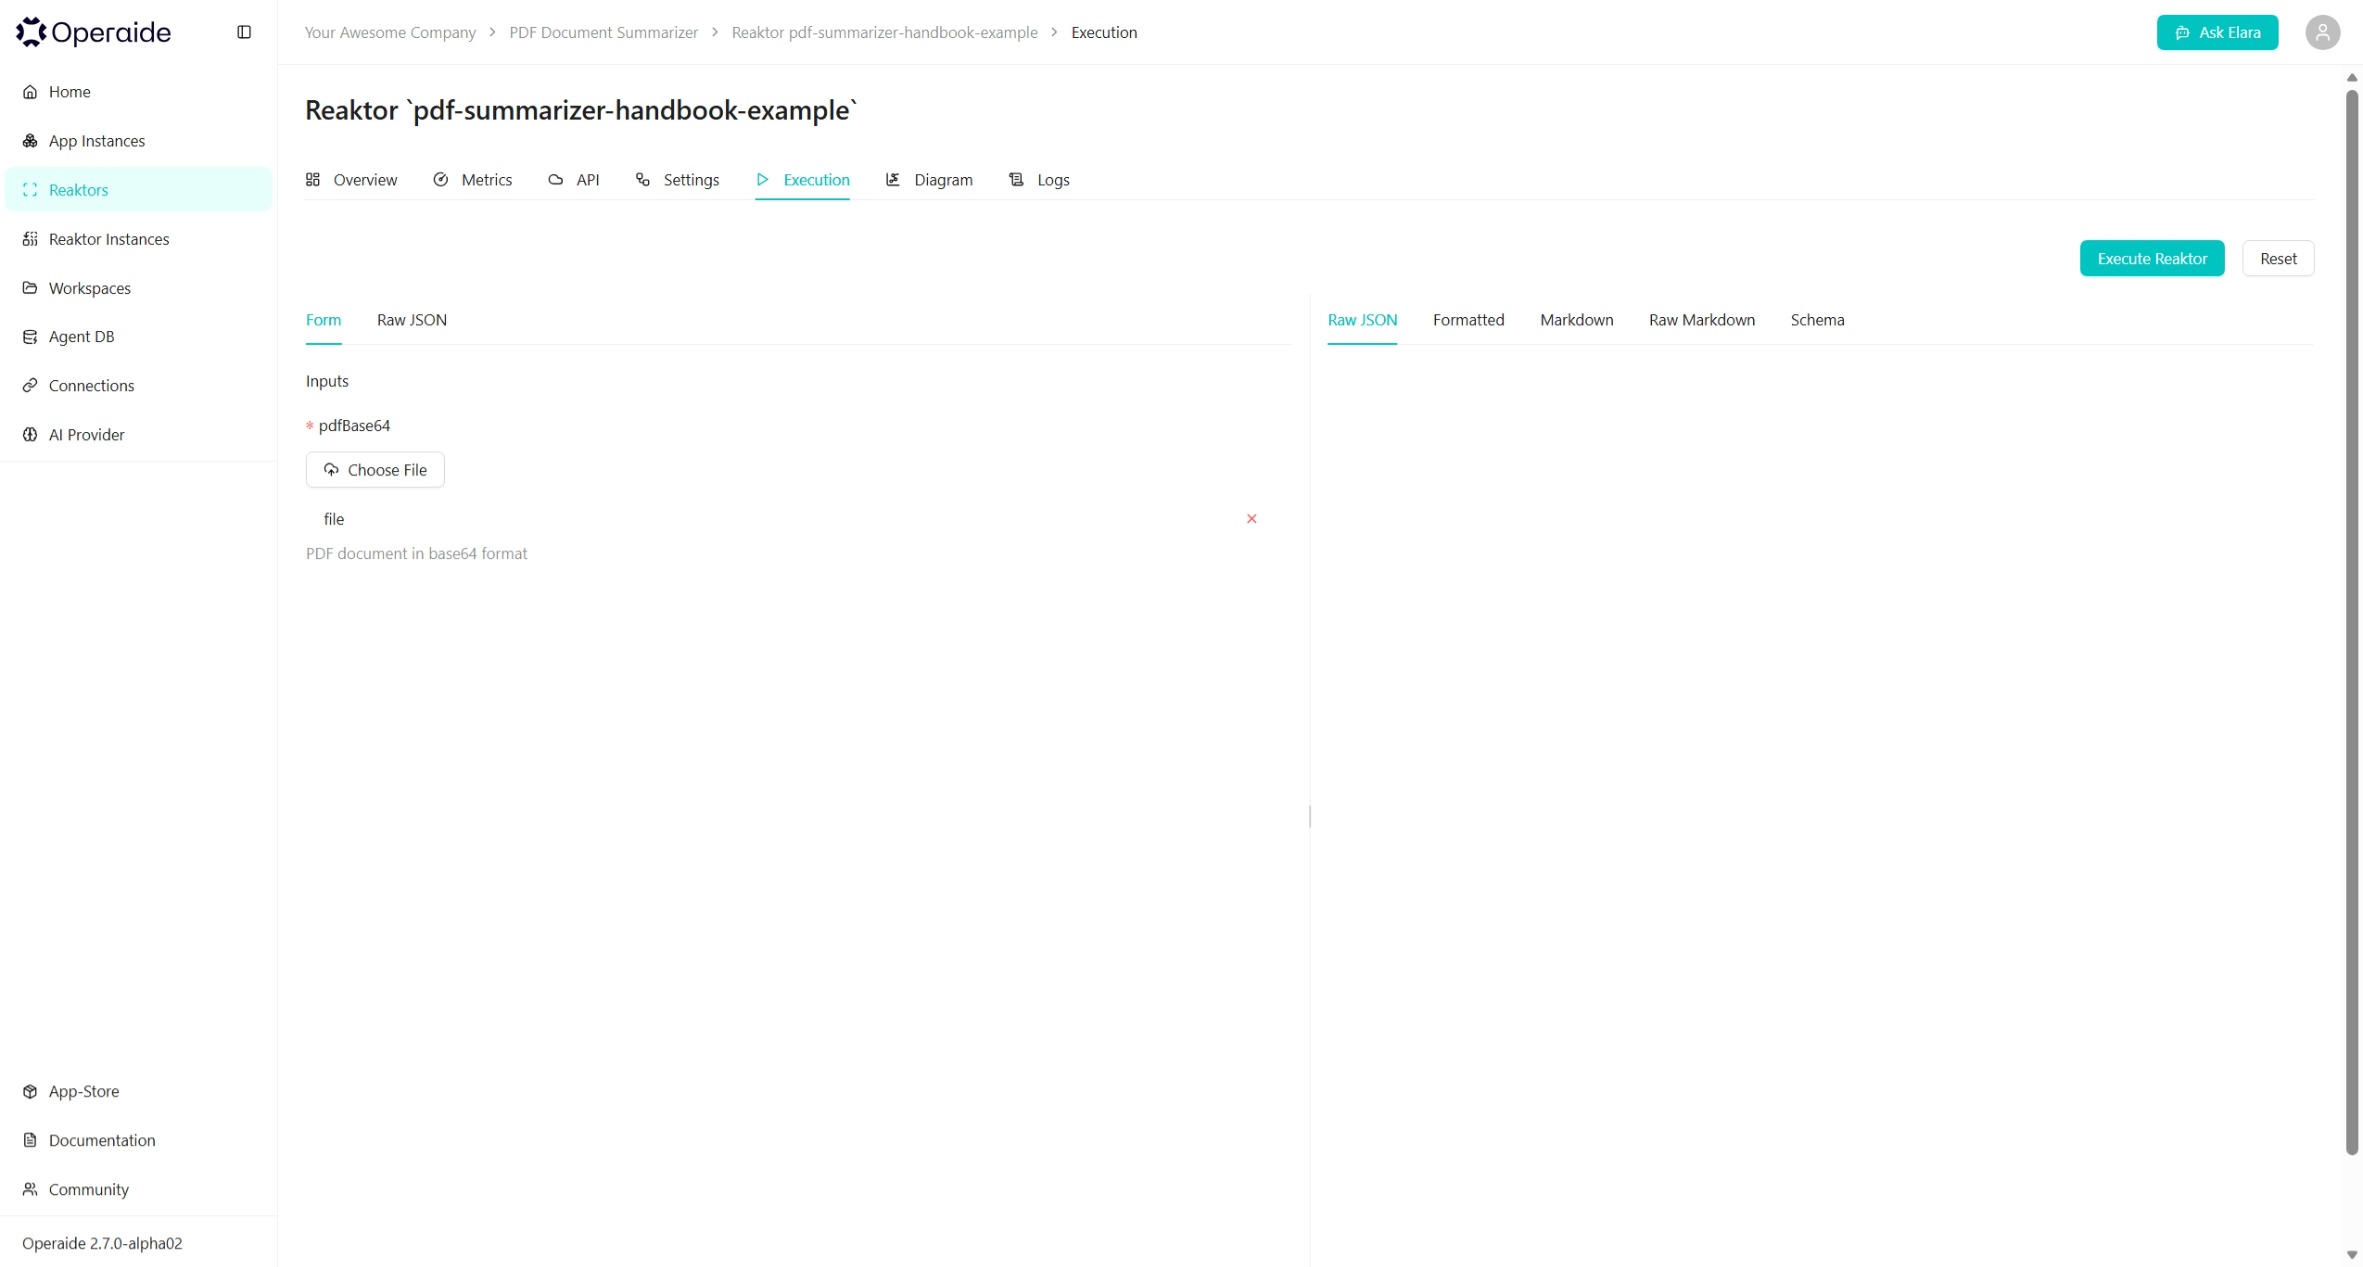
Once you open a Reaktor Deployment, you see seven tabs:
| Tab | Purpose |
|---|---|
| Overview | Status, description, and quick links |
| Metrics | Request counts and performance data |
| API | OpenAPI spec and Swagger UI link for this Reaktor |
| Settings | Per-Reaktor settings defined via aktorSetting() |
| Execution | Run the Reaktor with test inputs directly in the browser |
| Diagram | Reaktor diagram visualizing the Aktor graph |
| Logs | Execution traces and error details |
Test Your App
Go to the Execution tab. Here you can supply input values and run the Reaktor directly in the browser. The result is displayed inline.
Next Steps
- Test your App with different inputs to verify its behaviour
- Check the Logs tab to inspect execution traces and debug issues
- Monitor performance in the Metrics tab
- Adjust configuration in the Settings tab
- Return to Studio to make further changes and re-deploy